Help & Support Guide
Learn how to use all the powerful tools available on Custom Stock Alerts. From setting up stock alerts to calculating investment returns, this guide covers everything you need to know.
Table of Contents
Getting Started
Tools & Features
Account Management
Additional Resources
Getting Started
How Do I Get Started?
Getting started with Custom Stock Alerts is quick and easy. Follow these simple steps:
- Create an Account: Account registration is required to begin using the main features of the site. You can sign up here. Fill out the new user form to get started.
- Verify Your Email: After registration, check your email to verify your account (if required).
- Start Creating Alerts: Once logged in, navigate to "Alerts" in the top navigation bar to create your first stock alert.
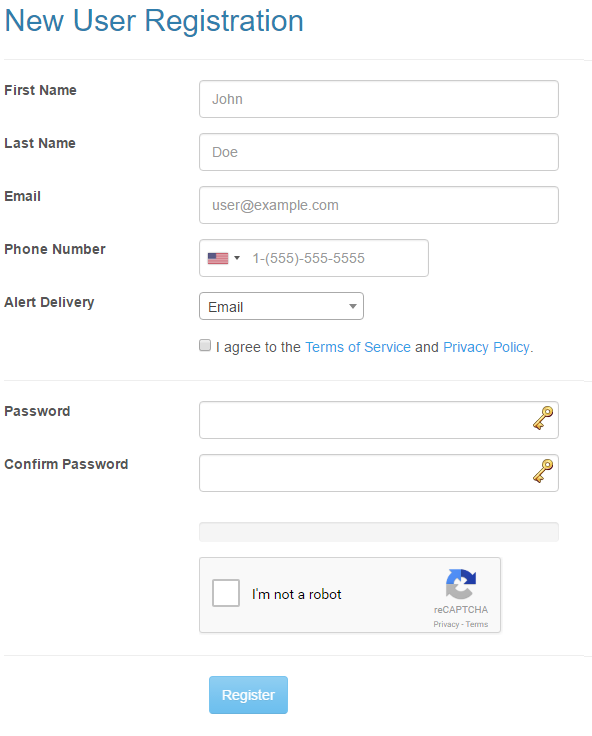
After successful registration, you'll see a confirmation message. From there, either click the link "Go To Alerts" provided in the success message or navigate yourself to "Alerts" at the top of the navigation bar.

Subscriptions & Pricing
Yes, there are subscriptions available that will unlock more features such as:
- Unlimited Alerts: Free accounts have limited alerts, while paid subscriptions offer unlimited alerts
- Ad-Free Experience: Enjoy a clean, distraction-free interface
- Advanced Alert Types: Access to moving average alerts and other premium features
- Priority Support: Get faster response times for support requests
Visit the pricing page to learn more about our subscription plans and features.
Stock Alerts
Stock alerts notify you when stocks meet your specified criteria. Set alerts for price movements, dividend yields, PE ratios, and more.
How Do I Create a Stock Alert?
When logged in, click the "Alerts" option in the navigation bar menu.

When the page loads, click the "New" button to create a new alert.

Fill out the alert form with the following information:
- Company/Ticker: Enter the ticker symbol (e.g., "AAPL") or company name. The search is flexible and will find matches by ticker or company name.
- Alert Type: Select the type of alert you want to create (see alert types below).
- Target Value: Enter the threshold value that will trigger your alert. Depending on the alert type, this may be a dropdown or text field.
- Active Status: By default, alerts are enabled. You can disable them during creation if needed.
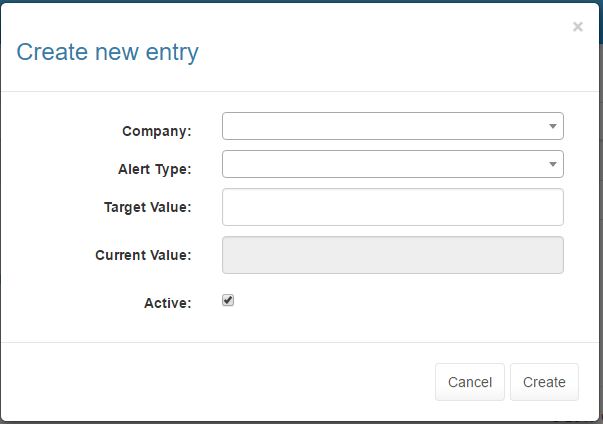
Example: Let's create an alert for SPY (S&P 500 ETF) to notify when the price goes above $250.
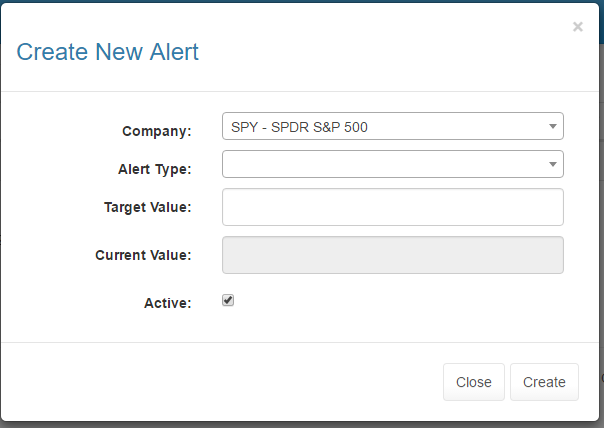
- Enter "SPY" in the company box
- Select "Price Above Limit" as the alert type
- Enter "250" as the target value
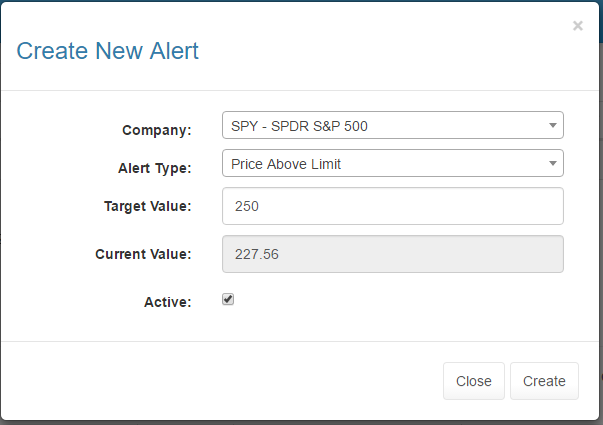
Click "Create" to save your alert. If the combination of ticker and alert type is unique, the alert will be created and appear in your alerts table.

That's it! Your alert is now active. When your alert triggers, you will be notified by your preferred method (email or SMS).
Tip: The create box remains open after creating an alert, allowing you to quickly create multiple alerts for the same ticker or different tickers.
How Do I Edit a Stock Alert?
Navigate to the "Alerts" page from the navigation bar.

Select the alert you want to edit from the table, then click the "Edit" button.

In the edit dialog, you can modify:
- Target Value: Change the threshold that triggers the alert
- Active Status: Enable or disable the alert
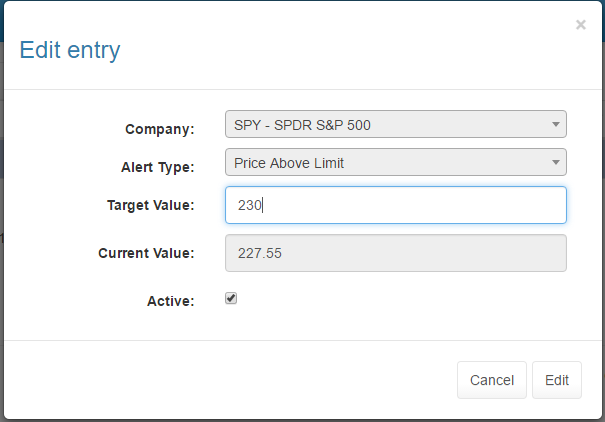
Click "Edit" to save your changes. The dialog will close and the record will be updated in the table.

How Do I Delete a Stock Alert?
On the alerts page, select the alert you wish to delete, then click the "Delete" button on the button bar.

In the confirmation dialog, click "Delete" to confirm the deletion.
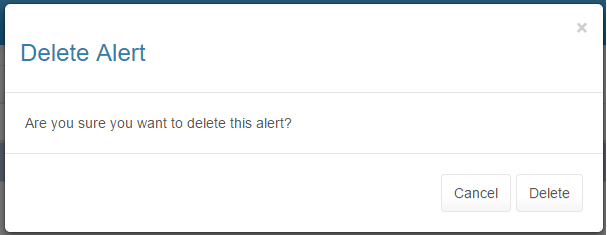
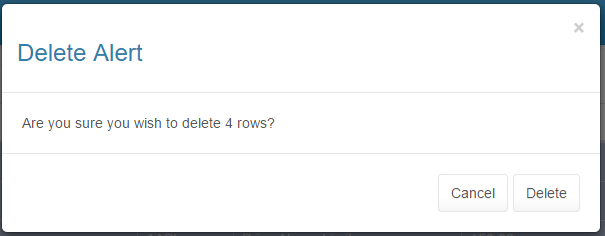
Bulk Delete: You can delete multiple alerts at once. Select a row, then Shift+Click on another row to select a range. Click "Delete" and confirm to delete all selected alerts.
How Do I Quickly Enable or Disable an Alert?
The quickest way to enable or disable an alert is to use the checkbox in the "Active" column:
Navigate to the alert you want to enable or disable on the alerts page.

Click the checkbox under the "Active" column to toggle the alert on or off. That's it! No need to open a dialog.

Note: By default, after an alert is triggered, it will be automatically disabled. You'll need to re-enable it if you want to receive notifications again.
What Types of Stock Alerts Are Available?
There are several types of alerts available, with more being added regularly. Here are the current alert types:
| Alert Type | Description |
|---|---|
| 52 Week High | Triggers when your selected symbol hits a 52-week high. You can also be notified when it's "close" to a new high (within a percentage you specify). |
| 52 Week Low | Triggers when your symbol hits a 52-week low. You can choose to be alerted when it hits a new low or when it's "close" (within a percentage you specify). |
| Dividend Yield Above Limit | Notifies you when the dividend yield goes above a limit you specify. Example: Alert me when XYZ yields more than 3%.* |
| Dividend Yield Below Limit | Notifies you when the dividend yield drops below a limit you specify. Example: Alert me when XYZ yields less than 2%.* |
| Price Above Limit | Triggers when your symbol crosses above a specific price. Example: Alert me when XYZ goes above $10 per share. |
| Price Below Limit | Triggers when your symbol drops below a specific price. Example: Alert me when XYZ drops below $10 per share. |
| PE Ratio Above Limit | Alerts you when the PE (price-to-earnings) ratio crosses above your limit. Example: Alert me when XYZ's PE goes over 20.* |
| PE Ratio Below Limit | Alerts you when the PE ratio crosses below your limit. Example: Alert me when XYZ's PE drops below 15.* |
| Daily Percent Price Change | Notifies you if the stock price changes by a percentage amount larger than your limit. Example: Alert me when XYZ has a price swing of more than 5% in a day. |
| Price Above/Below 50/200 Day Moving Average* | For premium members, you can choose from four combinations: price above/below the 50-day or 200-day moving average. |
Notes:
- Dividend Yield: Refers to the expected amount of dividends a company will pay this year divided by the current price. This does not include special dividends.
- PE Ratio: The PE (price-to-earnings) ratio is the trailing twelve month (TTM) GAAP earnings declared by the company. For some special cases of ADRs (American depositary receipts - non-US companies traded on US markets), this number may be off at certain times of the year. This metric may not be populated on some investment vehicles such as ETFs and mutual funds.
- * Premium Feature: Some alert types are available only to paid subscribers.
Ex-Dividend Alerts
Never miss a dividend payment! Ex-dividend alerts notify you before stocks go ex-dividend so you can plan your investments accordingly.
What Are Ex-Dividend Alerts?
Ex-dividend alerts notify you when a stock is about to go ex-dividend. The ex-dividend date is the date on which a stock begins trading without the value of its next dividend payment. To be eligible to receive a dividend, you must own the stock before the ex-dividend date.
Important: If an ex-dividend date falls on a Monday, you need to own the shares by market close on the previous Friday.
How Do I Create an Ex-Dividend Alert?
Navigate to "Ex-Dividend" from the Tools menu in the navigation bar.
Click the "New" button to create a new ex-dividend alert.
Enter the ticker symbol or company name in the search box.
Set your "My Value" - this is the number of shares you own or plan to own. This helps calculate the expected dividend payment.
The system will automatically populate the ex-dividend date, yield, and other relevant information.
Click "Create" to save your alert. You'll be notified before the ex-dividend date arrives.
Tip: You can import all dividend-paying stocks from your stock alerts page using the import feature, which will automatically create ex-dividend alerts for all stocks in your portfolio that pay dividends.
Managing Ex-Dividend Alerts
Ex-dividend alerts work similarly to stock alerts:
- Edit: Select an alert and click "Edit" to modify your share count or other settings.
- Delete: Select an alert and click "Delete" to remove it.
- Enable/Disable: Use the checkbox in the "Active" column to quickly toggle alerts on or off.
- Days To Go: The table shows how many days until the ex-dividend date, helping you prioritize which alerts need attention.
Stock Screener
Find stocks that match your investment criteria using our powerful stock screener. Filter by market cap, dividend yield, PE ratio, and more.
How Does the Stock Screener Work?
The stock screener allows you to filter stocks based on multiple criteria to find investment opportunities that match your strategy.
Access the Screener: Navigate to "Stock Screener" from the Tools menu in the navigation bar.
Set Your Filters: Use the filter sliders and dropdowns to specify your criteria:
- Market Cap: Filter by company size (small cap, mid cap, large cap)
- Dividend Yield: Set a minimum or maximum dividend yield percentage
- PE Ratio: Filter by price-to-earnings ratio range
- 52 Week Range: Filter stocks based on their 52-week high/low range
- Equity Type: Choose to screen stocks, ETFs, or preferred stocks
View Results: After setting your filters, the screener will display all stocks that match your criteria in a sortable table.
Create Alerts: From the results, you can select stocks and create alerts directly, making it easy to track stocks that meet your screening criteria.
Screener Tips & Best Practices
- Start Broad, Then Narrow: Begin with broader criteria and gradually narrow down to find the best matches.
- Combine Multiple Filters: Use multiple filters together to find stocks that meet all your criteria.
- Save Your Strategy: After finding stocks you like, create alerts to track them over time.
- Regular Screening: Market conditions change, so run your screens regularly to find new opportunities.
Note: The screener is a powerful tool for finding investment ideas, but always perform your own due diligence before making investment decisions.
Dividend Calendar
View upcoming dividend dates in our comprehensive dividend calendar. See which stocks are paying dividends and when, perfect for dividend investors.
How Does the Dividend Calendar Work?
The dividend calendar shows you upcoming dividend payments across all dividend-paying stocks in our database. It's organized into three main views:
- Dividend Stocks Tab: Shows all upcoming dividend payments with key information including ex-dividend dates, payment dates, dividend amounts, and yield.
- Metrics Tab: Displays key dividend metrics for each stock, including forward yield and dividend growth information.
- Growth Rates Tab: Shows dividend growth rates and trends over time.
Using the Dividend Calendar Filters
The calendar includes helpful filters to narrow down your view:
- Companies With Streaks Only: Filter to show only companies with a history of consecutive dividend increases (dividend champions and dividend aristocrats).
- Increases Only: Show only stocks that have increased their dividend compared to the previous payment.
Understanding Dividend Calendar Fields
| Field | Definition |
|---|---|
| Streak | Years of consecutive dividend increases per the U.S. Dividend Champions spreadsheet. This indicates companies with a strong history of dividend growth. |
| Forward Yield | The current listed yield multiplied by the announced increase. This gives you the expected yield after the dividend increase takes effect. |
| Ex-Div Date | The date you must own the stock before to be eligible for the dividend. Important: If the ex-dividend date is on a Monday, you need to own shares by market close the previous Friday. |
| Payment Date | The date when the dividend payment will be made to shareholders. |
| Increase Percent | The percentage increase in the dividend compared to the previous payment. |
Stock Return Calculator
Compare investment performance across multiple stocks with our comprehensive return calculator. Calculate returns with periodic investments, dividend reinvestment (DRIP), and automatic stock split adjustments.
What Is the Stock Return Calculator?
The Stock Return Calculator is a powerful tool that allows you to:
- Compare up to 10 stocks side-by-side over periods up to 20 years
- Calculate returns with periodic investments (monthly, quarterly, semi-annually, or annually) - perfect for dollar-cost averaging strategies
- Simulate dividend reinvestment (DRIP) to see the power of compound returns
- Automatically account for stock splits to ensure accurate calculations
- View interactive charts showing performance over time
- Analyze risk metrics including volatility, Sharpe ratio, and maximum drawdown
- See return breakdowns showing how much came from price appreciation vs dividend income
The calculator works with over 8,000+ tickers including stocks, ETFs, and other securities with comprehensive historical data coverage.
How to Use the Stock Return Calculator
Step 1: Select Stocks
Start by typing either the company name or ticker symbol into the search box. You can select up to 10 ticker symbols for comparison. The calculator works with stocks, ETFs, and other securities.
- Index-Based Income Funds (SPY, QQQ, IWM and their income variants)
- Single Stock Income Funds (NVDA, TSLA, AAPL, MSFT, GOOGL, NFLX, COIN, MSTR, PLTR, HOOD)
- Crypto Income ETFs (Bitcoin and Ethereum income strategies)
- Commodity Income Funds (Gold and Silver income ETFs)
- Leveraged ETFs (2X daily leveraged strategies)
- Dividend Growth ETFs (SCHD, DIVO, DGRO, VYM)
- Short Duration Bonds (SGOV, BIL, MINT, CSHI)
- Real Estate Income Funds (REITs and ETFs)
- Fund of Funds (WPAY, YMAX and other weekly paying funds)
Step 2: Set Your Investment Parameters
- Initial Investment: Enter your starting investment amount (default: $10,000)
- Periodic Investments: Optionally enable periodic investments to simulate regular contributions:
- Choose frequency: Monthly, Quarterly, Semi-Annually, or Annually
- Enter the amount you'll invest each period
- This simulates dollar-cost averaging strategies
Step 3: Choose Date Range
Select your start and end dates, or use quick date buttons:
- Month to Date
- Quarter to Date
- Year to Date
- 1 year, 3 years, 5 years, 10 years
The calculator automatically normalizes dates across all selected tickers for fair comparison, ensuring all stocks are compared over the same time period.
Step 4: Configure Dividend Options
Choose how to handle dividends:
- Reinvest Dividends (DRIP): Automatically reinvest all dividends to purchase more shares
- Collect as Cash: Receive dividends as cash payments (not reinvested)
- Calculate Both: Compare scenarios with and without dividend reinvestment to see the difference
Step 5: Analyze Results
After clicking "GO!", you'll see:
- Detailed Return Metrics: Total return, annualized return, and return breakdown
- Interactive Charts: Line charts, area charts, and risk vs return scatter plots
- Risk Analysis: Volatility, Sharpe ratio, maximum drawdown, and other risk metrics
- Return Breakdown: See how much of your return came from price appreciation vs dividend income
Pro Tip: To compare to market indices like the S&P 500, use the corresponding ETF (e.g., SPY for S&P 500, QQQ for NASDAQ, DIA for Dow Jones).
Understanding the Results
Return Metrics
- Total Return: The total percentage gain or loss on your investment
- Annualized Return: The average annual return over the investment period
- Final Value: The total value of your investment at the end of the period
- Total Invested: Sum of initial investment plus all periodic investments
Risk Metrics
- Volatility: Measures the degree of variation in returns (standard deviation)
- Sharpe Ratio: Measures risk-adjusted return (higher is better)
- Maximum Drawdown: The largest peak-to-trough decline during the period
- Beta: Measures sensitivity to market movements (if applicable)
Return Breakdown
The calculator shows how much of your return came from:
- Price Appreciation: Gains from stock price increases
- Dividend Income: Returns from dividend payments (with or without reinvestment)
Important Disclaimers
- Investment taxes (capital gains, dividend taxes)
- Brokerage fees and transaction costs
- Expense ratios for ETFs and mutual funds
- Inflation
Returns shown are pre-tax and do not reflect the impact of taxes, fees, or other costs. Actual after-tax returns may vary significantly based on:
- Individual tax situations
- Holding periods
- Account types (taxable, IRA, 401k, etc.)
Always consult with a tax professional and perform your own due diligence before making investment decisions.
Market Index Tickers
To compare your investments to major market indices, use these ETF tickers:
| Index | Ticker To Use |
|---|---|
| S&P 500 | SPY |
| Dow Jones Industrial Average | DOW |
| NASDAQ | QQQ |
| Russell 2000 | IWM |
Payment Information
Who Handles Your Payments?
Payments are handled securely by Stripe, a leading payment processor trusted by millions of businesses worldwide.
When you initiate a subscription or update your payment information, you will be presented with a secure Stripe payment form.

Security: Any payment information you enter is securely transferred directly to Stripe's servers for processing. It does not hit any server owned by Custom Stock Alerts. In simple terms - Custom Stock Alerts has no access to your credit card information.
The only payment information available to us (and shown to you on your "My Account" page) is:
- Card type (Visa, Mastercard, etc.)
- Last 4 digits of your card

Subscription Management
How Do I Start a Subscription?
Visit the pricing page to view available subscription plans.

Select the plan that works best for you. There is an 18% discount for choosing the yearly plan over the monthly plan.
Complete the secure payment process through Stripe.
Upon successful subscription, you will see a confirmation message.

How Do I Change My Subscription?
Navigate to your "My Account" page by clicking your name in the top right corner and selecting "My Account".
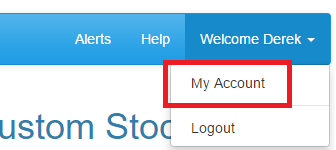
Scroll down to the "Account Information" section, which shows your account type, current payment method, and next billing date. Click on "Change Subscription".

The change subscription screen will show the impact of changing plans. You can switch between monthly and yearly plans, and the amount you owe or are due back will be prorated automatically.
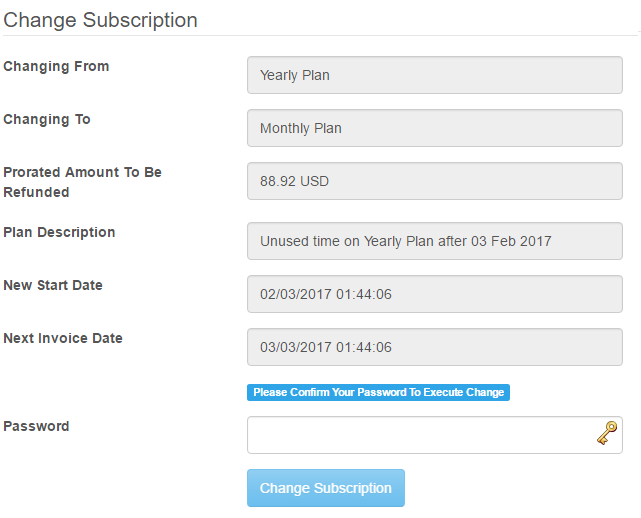
Note: Each change may cause an immediate credit card charge or refund through Stripe, based on the prorated amount.
Upon completion, you will see a confirmation message.

How Do I Cancel My Subscription?
Navigate to your "My Account" page by clicking your name in the top right corner and selecting "My Account".

Scroll down to the "Account Information" section and click on "Change Subscription".

On the cancellation screen, review your current status and any refund you will receive. Refunds are prorated based on the time remaining in your subscription period.
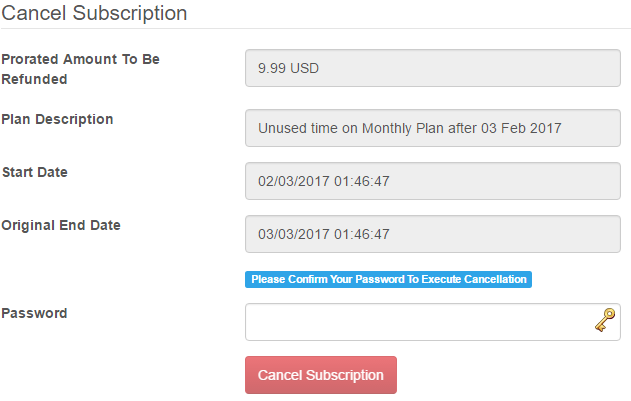
Example: If you have a yearly plan and it's been 6 months, you should expect approximately 50% of your subscription fee back.
If you agree to cancel, confirm your password and click "Cancel Subscription".
You will receive confirmation that your cancellation request was successfully processed.

Note: After cancellation, you will retain access to premium features until the end of your current billing period.
Troubleshooting
Common Issues and Solutions
Alerts Not Triggering
- Check if the alert is active: Make sure the checkbox in the "Active" column is checked.
- Verify the target value: Ensure your target value is set correctly (e.g., for "Price Above Limit", make sure the target is above the current price).
- Check notification settings: Verify your email and/or SMS notification preferences in your account settings.
- Allow time for processing: Alerts are checked periodically. There may be a delay between when a condition is met and when you receive the notification.
Can't Find a Ticker
- Try the ticker symbol: Use the official ticker symbol (e.g., "AAPL" for Apple) rather than the company name.
- Check spelling: Ensure the ticker symbol is spelled correctly.
- Not all securities are supported: We support 8,000+ tickers, but some securities may not be available. Try searching for a similar ETF or stock.
Calculator Showing Incorrect Data
- Check the date range: Ensure your selected date range has available historical data for the ticker.
- Verify ticker symbol: Make sure you're using the correct ticker symbol.
- Some metrics may be unavailable: Certain metrics (like PE ratio) may not be available for ETFs or some securities.
Payment Issues
- Contact Stripe support: Since payments are processed by Stripe, contact their support for payment-related issues.
- Check your card: Ensure your credit card is valid and has sufficient funds.
- Contact us: If you continue to have payment issues, contact us at support@customstockalerts.com.
Frequently Asked Questions
General Questions
Is Custom Stock Alerts free?
Yes! We offer a free tier with limited alerts. Paid subscriptions unlock unlimited alerts, advanced features, and an ad-free experience.
What data sources do you use?
We use multiple data sources to provide comprehensive and accurate stock data, including price data, dividend information, and financial metrics.
How often is data updated?
Stock prices and market data are updated throughout the trading day. Dividend information and other metrics are updated regularly to ensure accuracy.
Can I use this for day trading?
While our tools can help with investment decisions, we recommend using them as part of a comprehensive investment strategy. Always do your own research and consider consulting with a financial advisor.
Still Need Help?
If you couldn't find the answer to your question in this guide, we're here to help!
Contact Support: support@customstockalerts.com
We typically respond within 24-48 hours. For urgent issues, please include "URGENT" in your subject line.